Images & Textures
There are two types of images to consider:
- Background images
- Images that will render within the 3D scene. Applied on a 3D shape. Often called a texture.
Background images
You can only have one background image per scene. The background image is a 2D image that is rendered behind the 3D scene. It is not affected by the camera or lights and will always fill the whole view.
import { BackgroundImage, Camera, DefaultLight } from "react-native-filament";
import BackgroundImageMaterial from "./assets/background_image.filamat";

const imageResource = require("./assets/background.jpg");

function Renderer() {
  return (
    <FilamentView style={styles.container}>
      <Camera />
      <DefaultLight />

      <BackgroundImage
        source={imageResource}
        materialSource={BackgroundImageMaterial}
        resizeMode="cover"
      />
    </FilamentView>
  );
}
Materials
As you may noticed, we imported a .filamat file and passed it as a prop to the BackgroundImage component. A material in filament "defines the visual appearance of a surface.".
To completely describe and render a surface, a material provides the following information:
- Material model
- Set of use-controllable named parameters
- Raster state (blending mode, backface culling, etc.)
- Vertex shader code
- Fragment shader code
For rendering a background image you can use the pre-compiled material from the exampels:
This material receives an image texture as input, which the BackgroundImage component will automatically set using the image you've provided.
Only .png and .jpg images are supported yet. Support for .webp is coming soon.
If you're curious how materials are defined you can have a look at the material definition for the background material.
Compiled materials are .filamat files, where the definition files are human-readable .mat files.
Materials are thus a way to provide custom shaders.
Applying textures
For applying images as textures to 3D shapes need to have:
- A 3D module, that uses a material with a texture parameter (by default if your model/material is using an image texture)
- Know the entity of your model that's using the material
- Know the name of the material
For example, let's say we have this 3D model of a rocket. When we open it in blender we see:
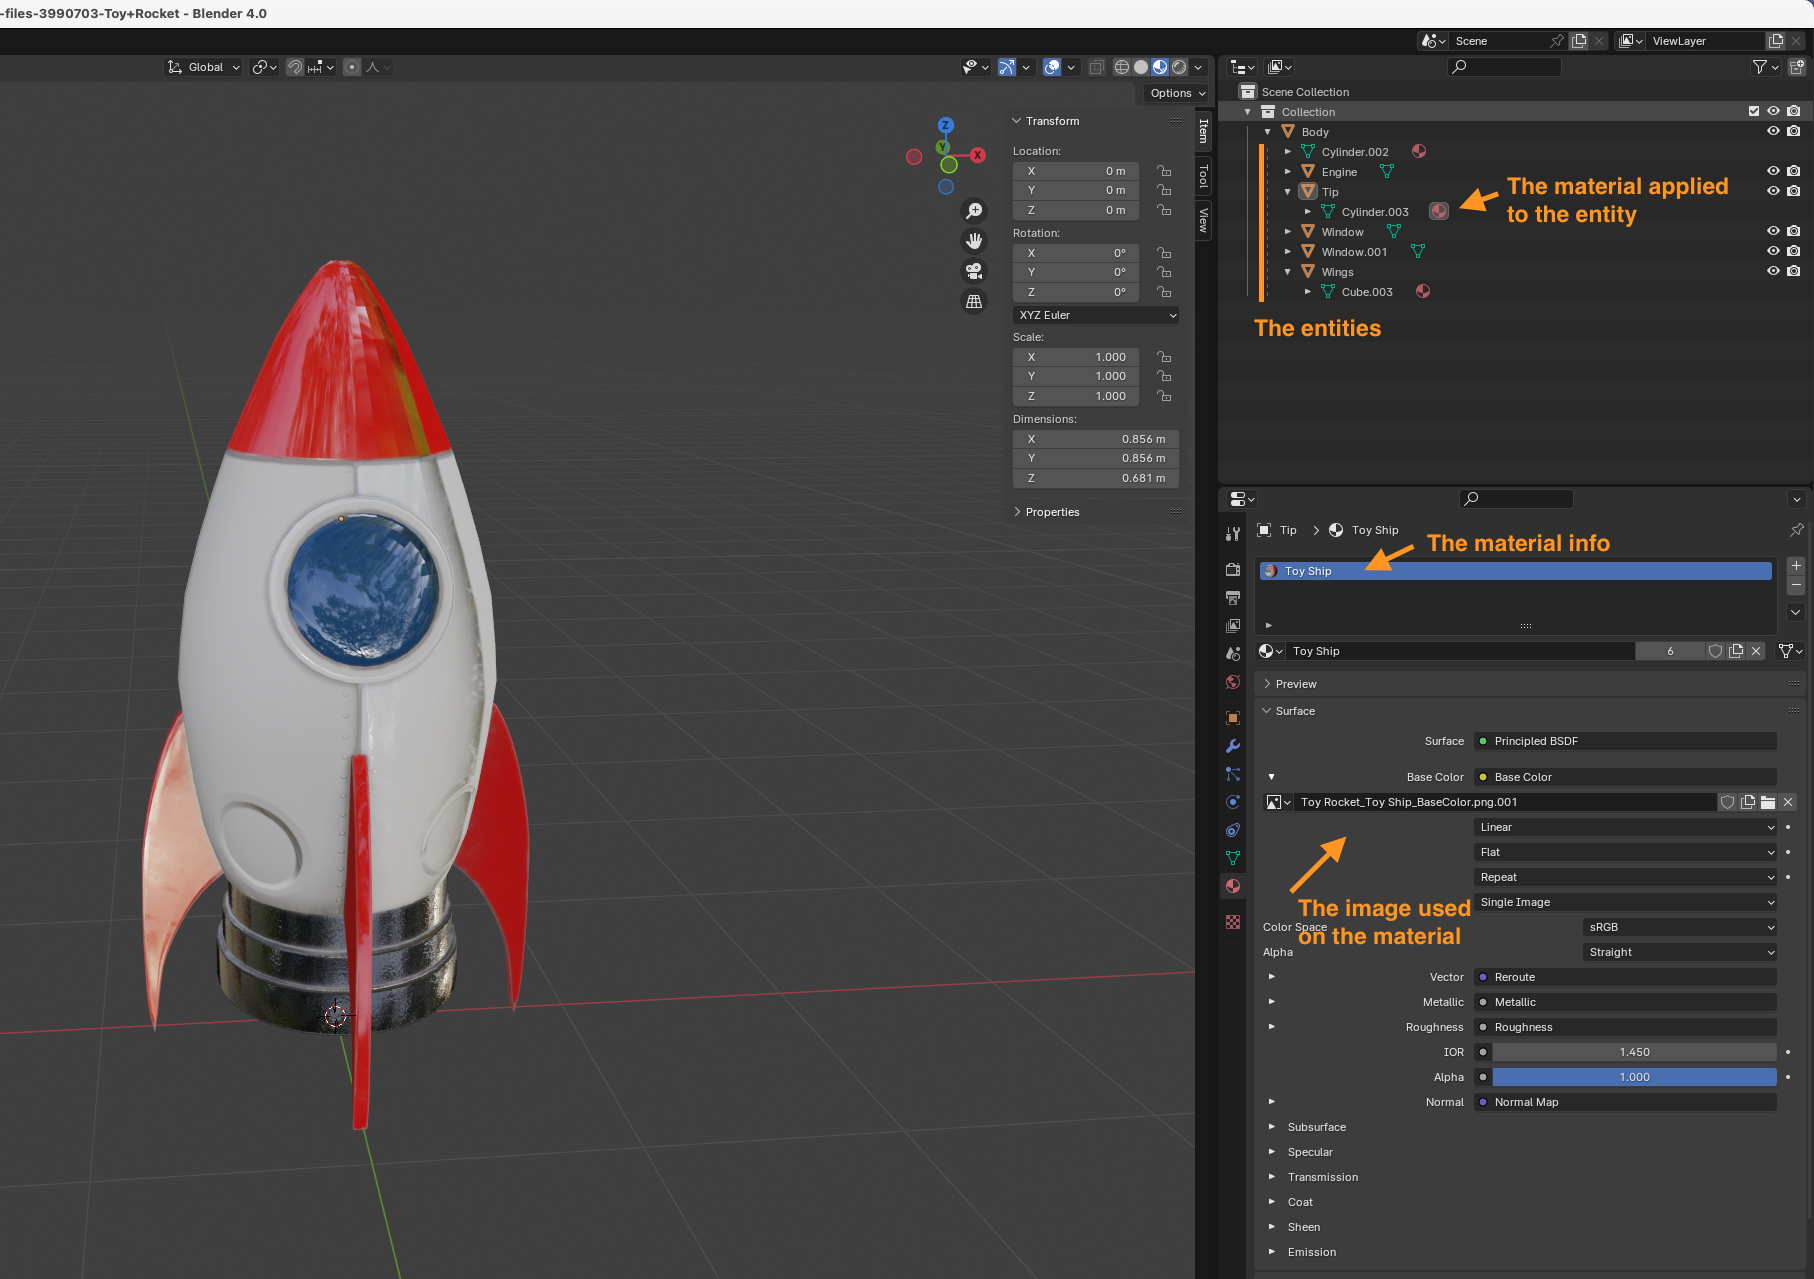
- In the top right corner you see the entities:
Engine,Tip,Wings, etc. - You can see that an entity is associated with a material.
- You can see the materials name is "Toy Ship", and you can see it uses a texture.
| The base texture looks like this: | Variant of the base color texture : |
|---|---|
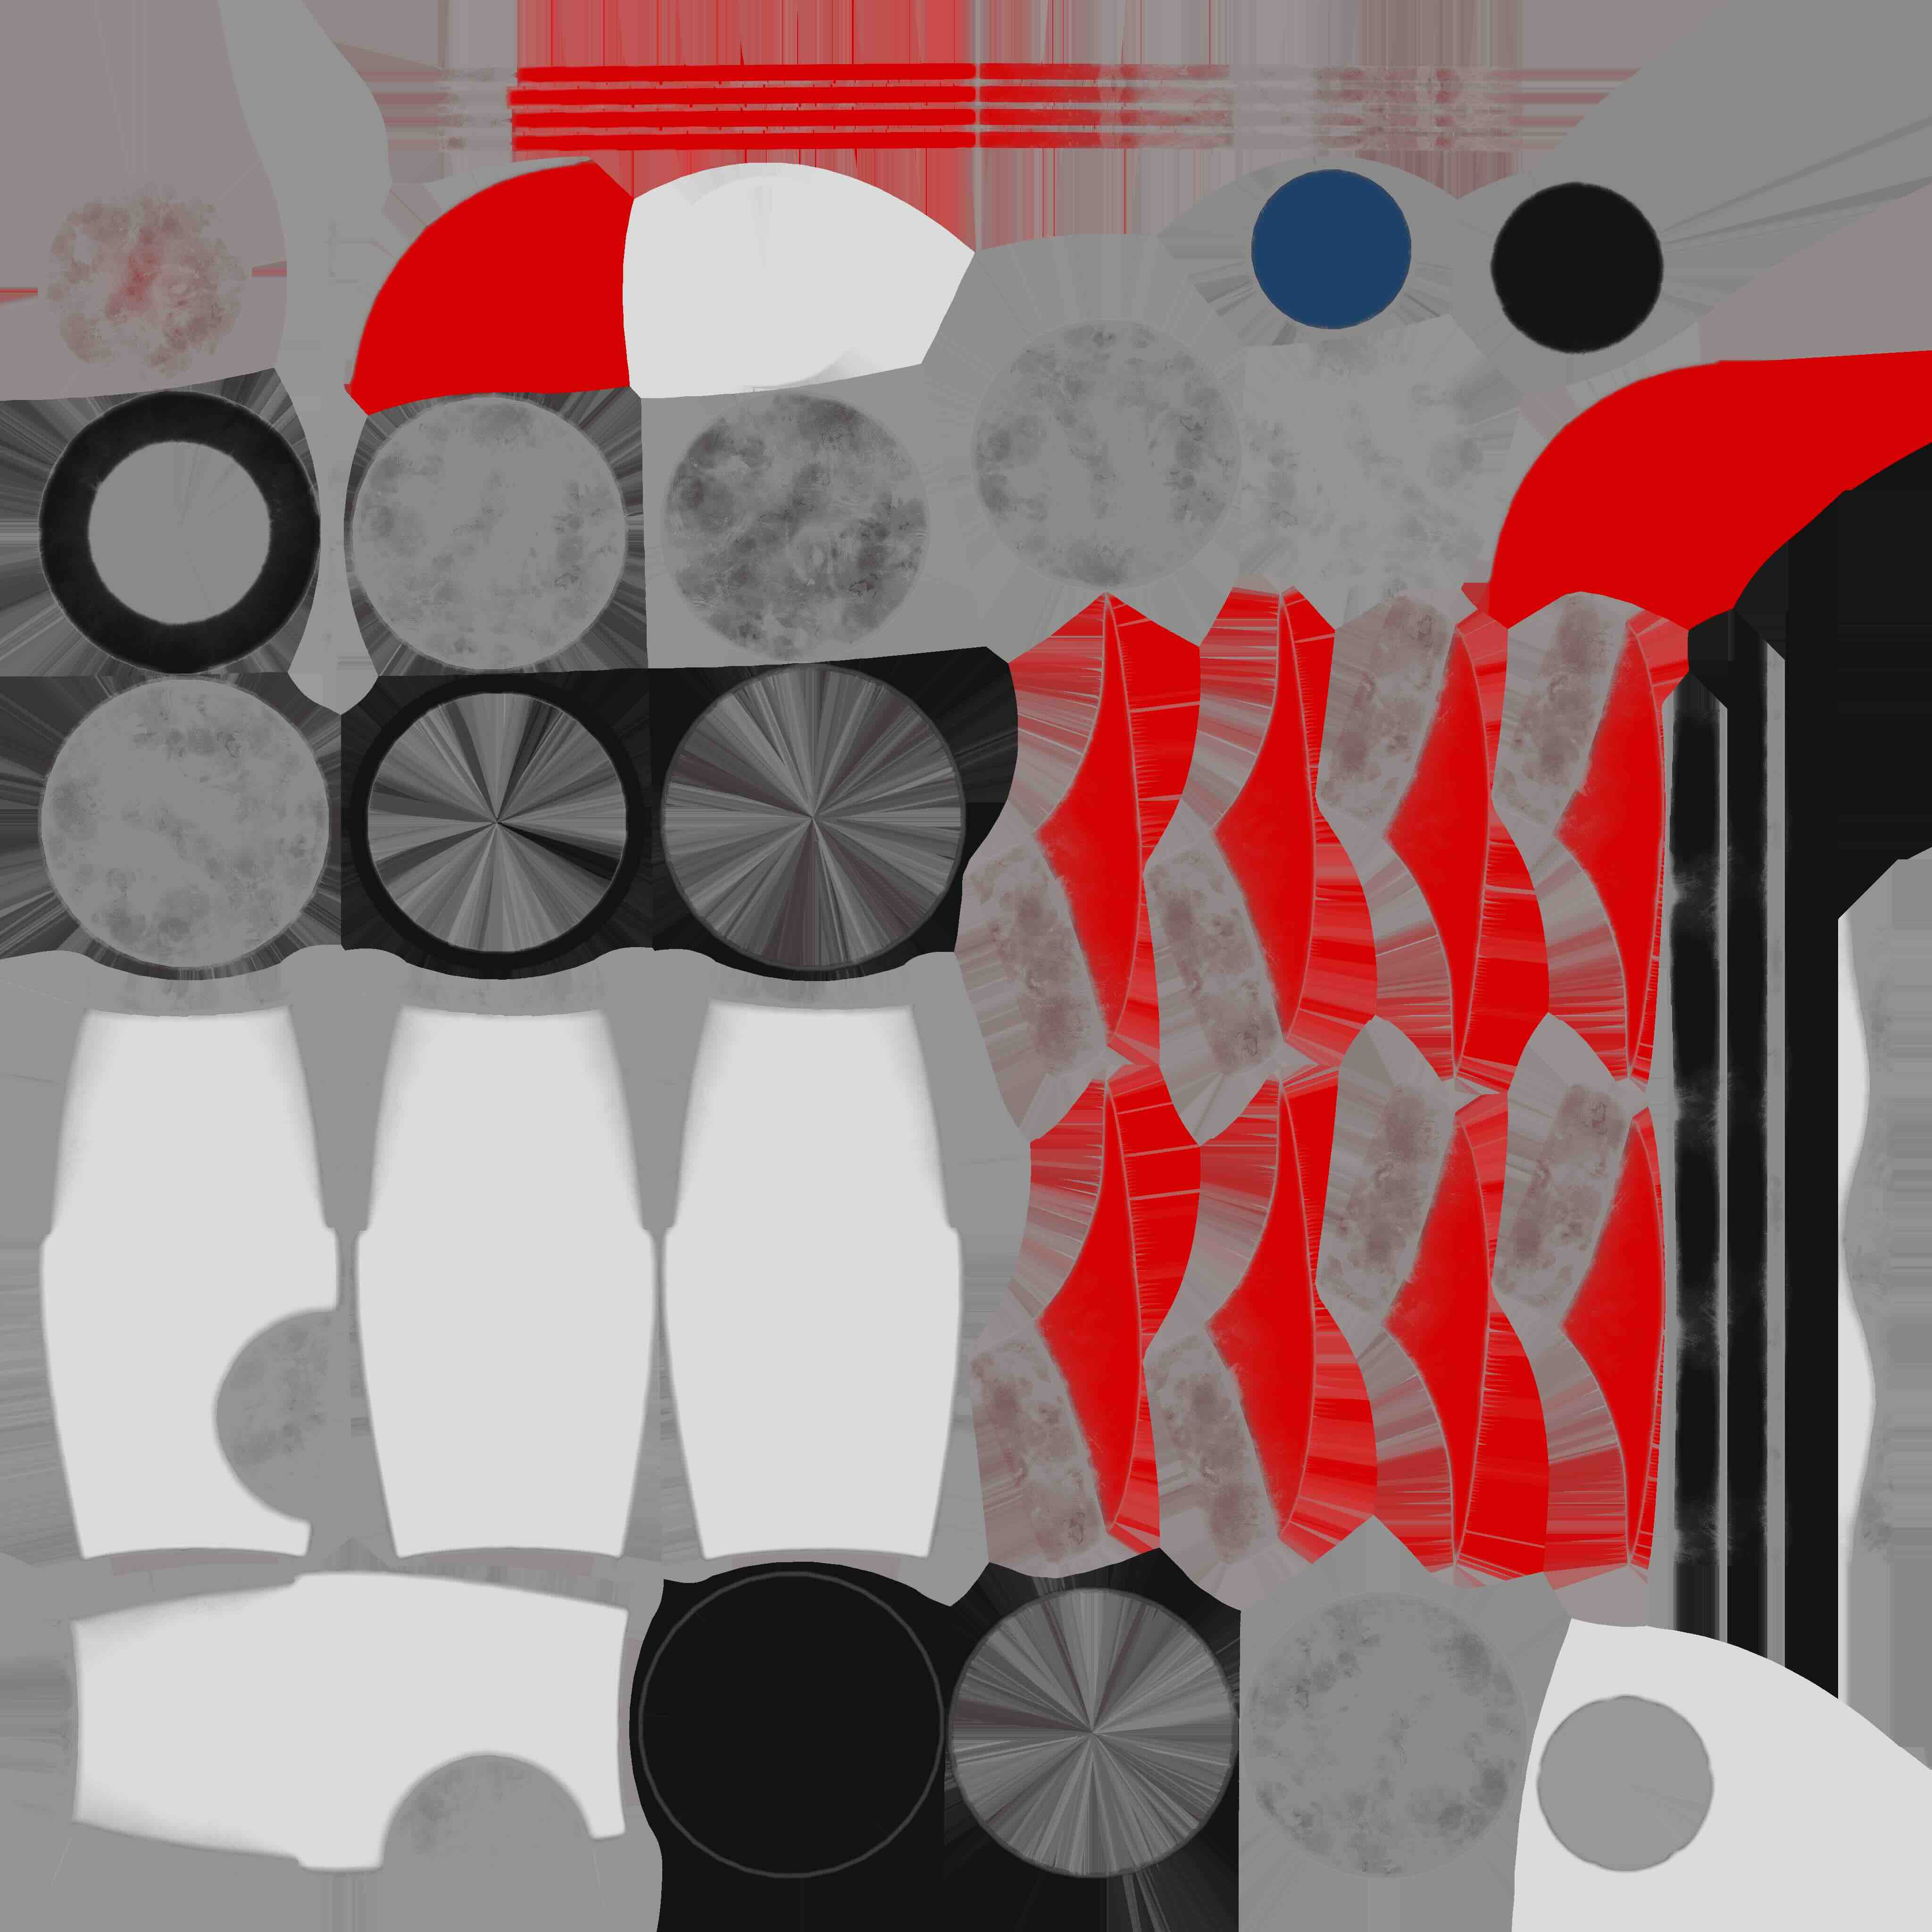 | 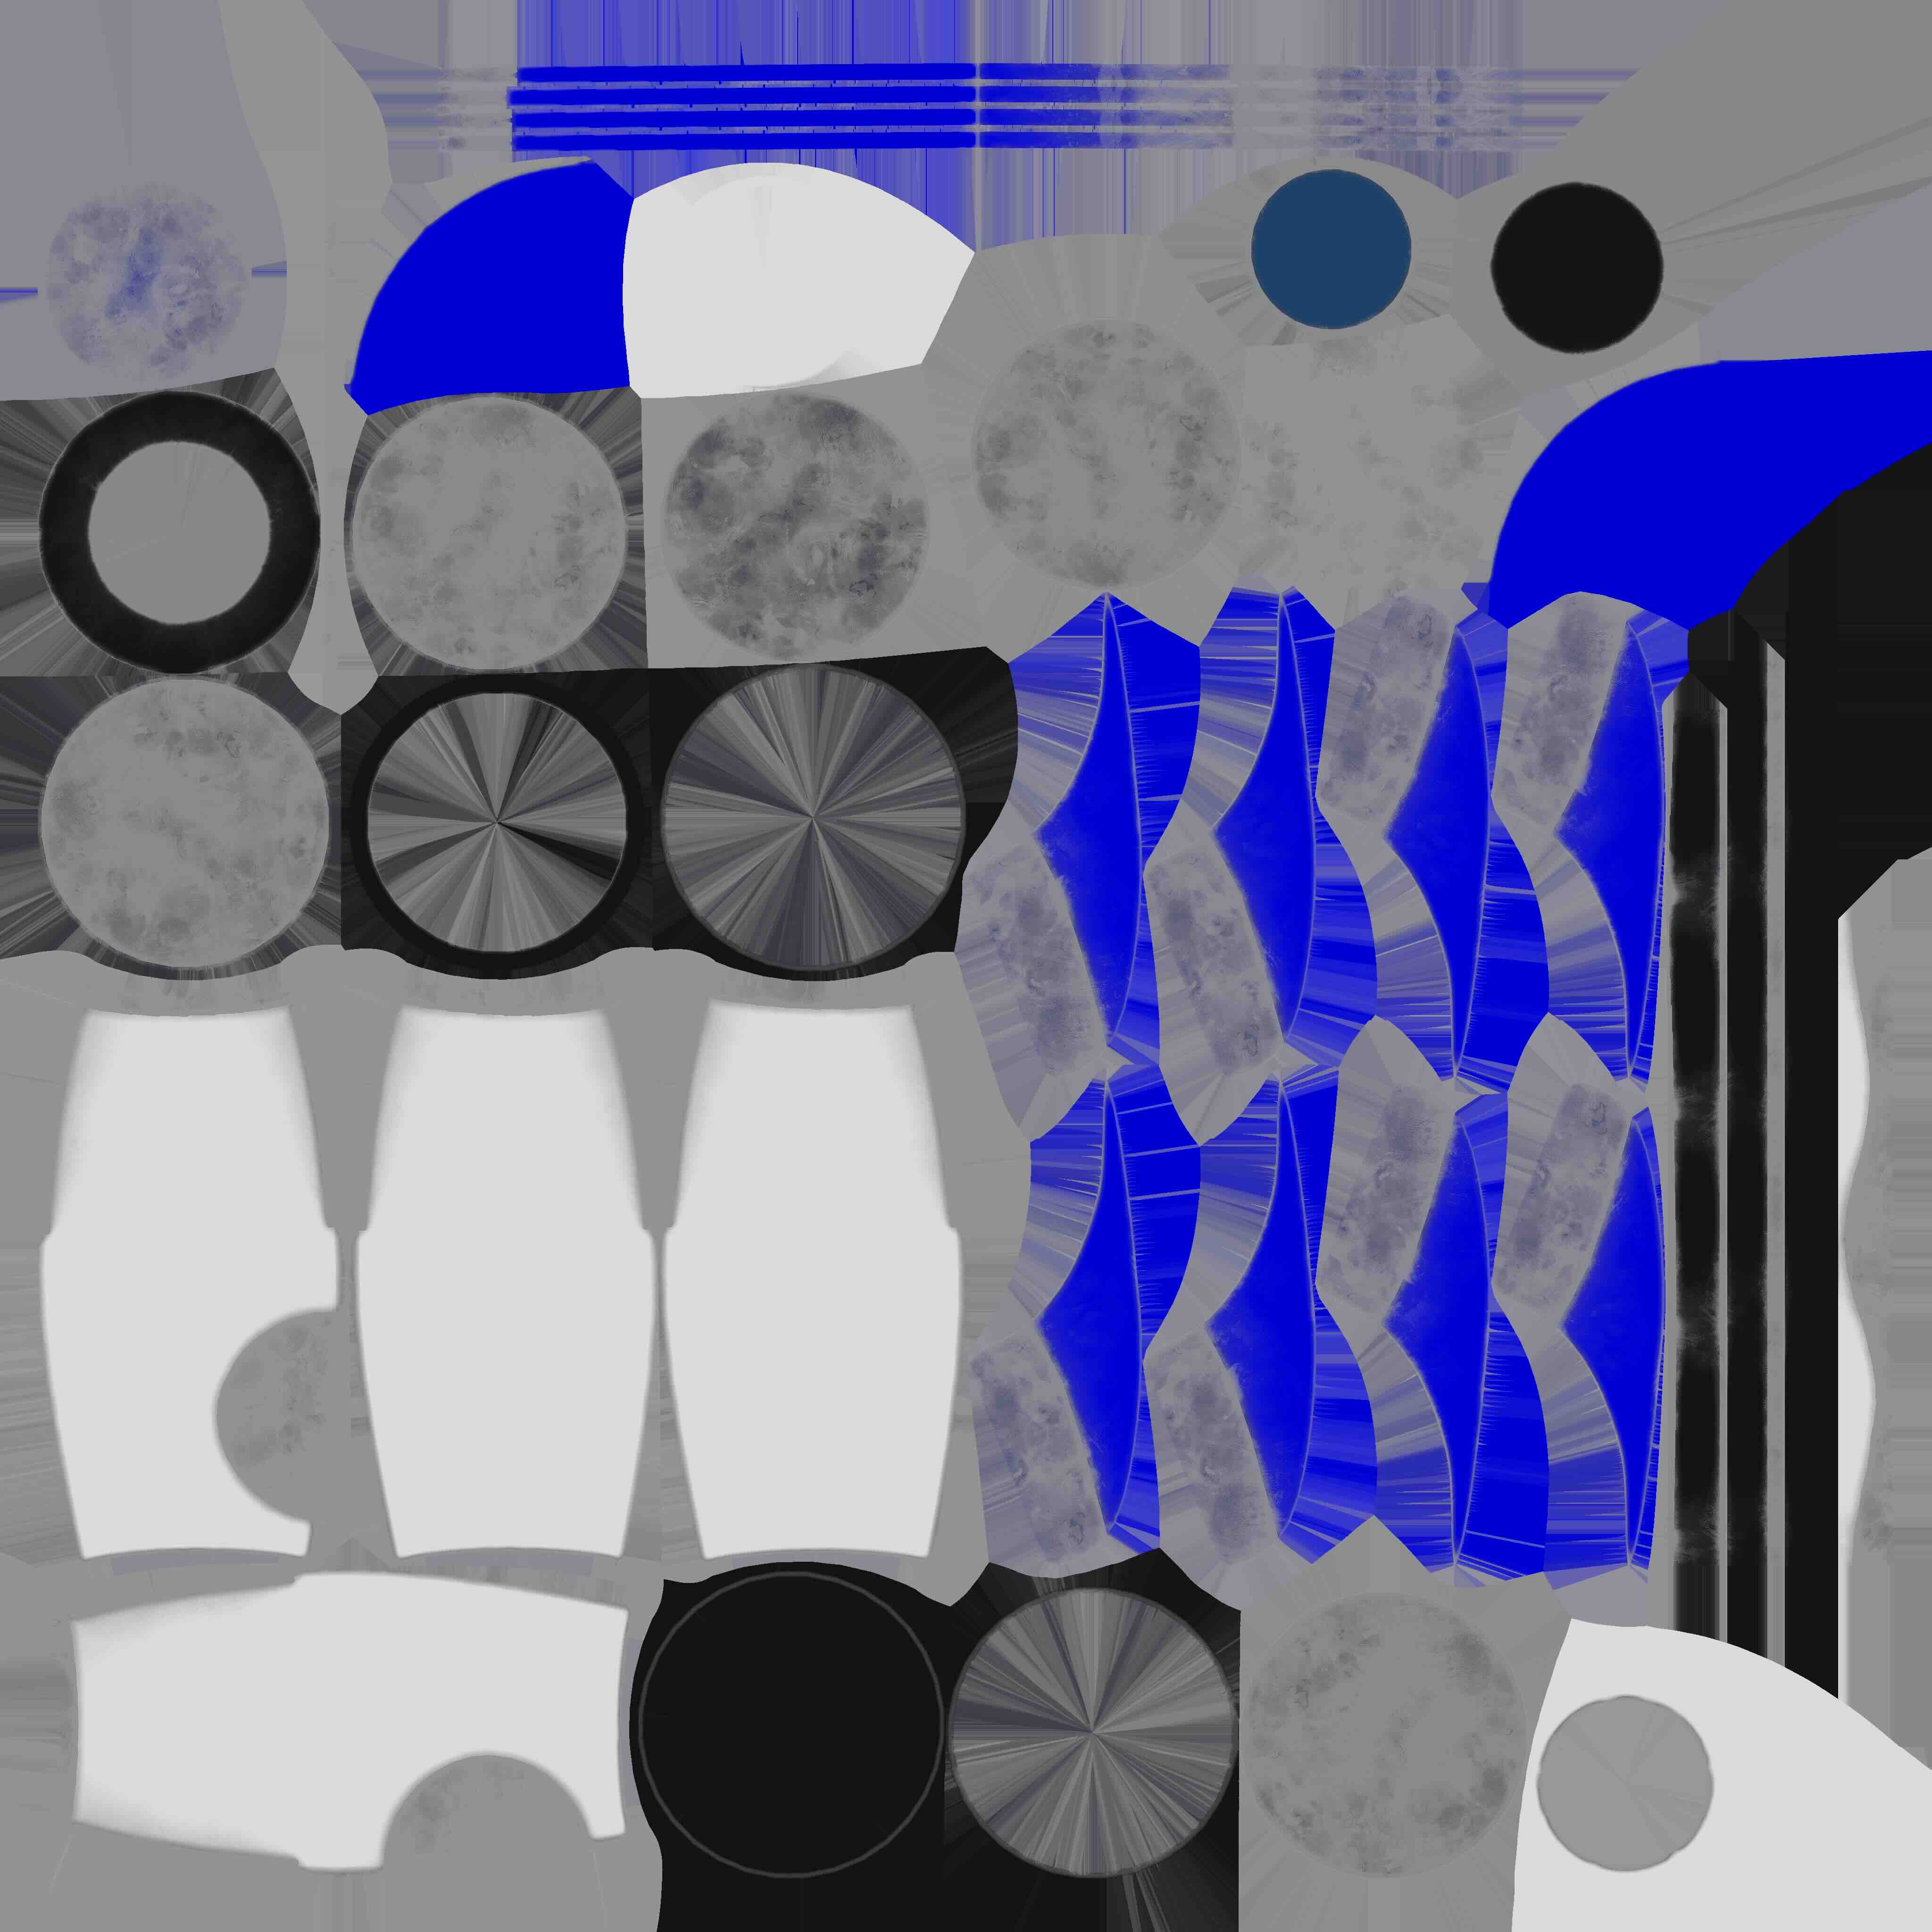 |
Now we can apply the new texture to the model:
import RocketGlb from '~/assets/rocket.glb'
const baseColorBlueImage = require('~/assets/rocket_BaseColor_Blue.png')

function Renderer() {
  // Load the texture as a buffer
  const blueBaseColorBuffer = useBuffer({ source: baseColorBlueImage })

  // The name of the material on the entity we want to change
  const materialName = 'Toy Ship'

  return (
    <FilamentView style={styles.filamentView}>

      <Model source={RocketGlb}>
        {blueBaseColorBuffer != null && (
          <>
            {/* Inside the <Model> we can use the <EntitySelector> to apply modifiers */}
            <EntitySelector byName="Tip" textureMap={{ materialName, textureSource: blueBaseColorBuffer }} />
            <EntitySelector byName="Wings" textureMap={{ materialName, textureSource: blueBaseColorBuffer }} />
          </>
        )}
      </Model>
    </FilamentView>